How to Permanently Delete Conexant Audio Drive in Windows 10.
If you are reading then you've probably searched all over the internet helplessly looking for a way to delete the Conexant drive in your PC. Conexant media drive affects sound on your speakers or your headphones thus getting this scratchy sound when you add volume.

It really affects the base a lot. It took me a lot of sieving through information on the internet looking for a solution. Followed through all the methods given and found no answer. After a while, I resigned to having it on my desktop.
We all know trying to delete it from your control panel doesn't work. Once you restart it and you are connected to the internet, Windows downloads and installs it automatically back into your PC, annoying right?
Well, no more, I have just the solution for you. Read through carefully.
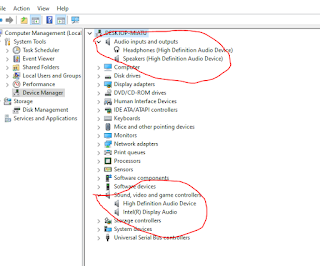
Right-click on This PC>Device Manager>Click on Conexant Audio Drivers>Uninstall. Delete the file in your local Dick C Drive. IN Program Files. After that, turn off your internet connection then restart your PC. Remember, leave your connection turned off. You will find that there are new drivers installed instead of Conexant drivers.
These drivers allow you to select speakers or headphones easily. If you turn on the internet connection, Conexant will install automatically, so make sure that it is still of.
Type Edit Group Policy in your search bar and select it. Move to Administrative Templates>System>Device Installation>Device Installation Restrictions.
Enable the last option that prevents windows from installing some drivers automatically.
You left-click and click on edit. Then click on the button "Enable".
The final step is to press right-click on PC>Properties>Advanced System Settings>Hardware>Device Installation Settings>Then select the "No" option.
Now you can turn on your internet connection and Conexant will be no more.
I hope this helps you out!


Comments
Post a Comment